Creating from scratch
This article covers the basic steps for creating your own image based on ALT Atomic Core or another existing ALT Atomic image.
Preparing the repository
0. First steps
Before creating your own image, it is recommended to explore other existing images:
ALT Linux Space
ALT Atomic images are built on the ALT Linux Space service as OCI containers.
The built container is downloaded to the target machine and deployed as a full-fledged atomic distribution using the Live installer. This method can be called "Netinstall", since the installer image does not contain a pre-prepared system.
To create your own image, you need to create an account on ALT Linux Space:
- Go to the ALT Linux Space home page;
- Click the "Sign in" button in the upper right corner;
- Click "Sign in via ALT Linux ID";
- From the suggested list, select a third-party authentication service and sign in to your account. If you are a member of ALT Linux Team, sign in with your credentials;
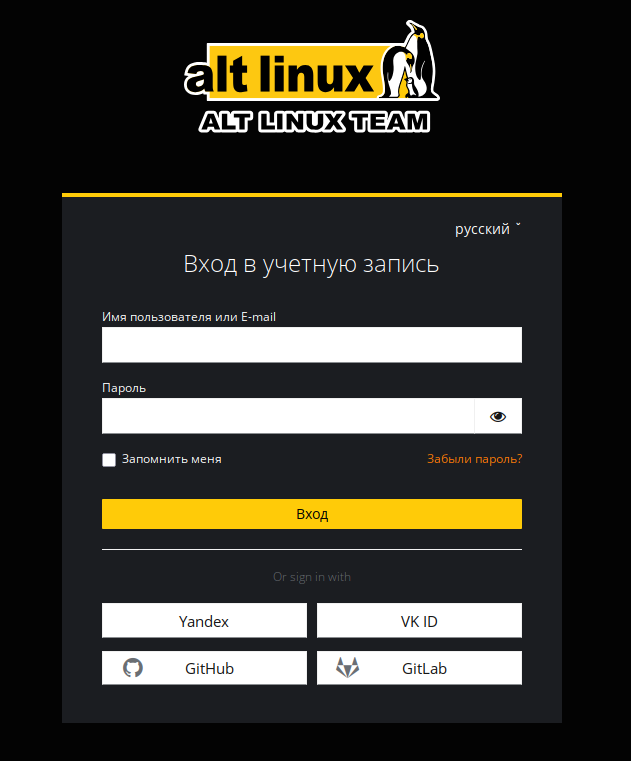
Done. Your ALT Linux Space account has been created.
Choosing a base image
To create your own image, you need to use some other image as a base.
You can take one of the images listed above or another one created by the community.
Also, the organization ALT Atomic provides ALT Atomic Minimal images — blank images for creating your own version of ALT Atomic on any graphical stack.
Image goals
When creating your own edition of ALT Atomic, it is important to formulate the final result: if this is a new image "from the community for the community", it should cover basic tasks and, if intended, solve the tasks set for it. The software set, presets, branding, and other aspects may depend on this.
1. Repository
To simplify the process of creating an ALT Atomic image, a repository template has been prepared, which already contains a prepared example config, a simple workflow for building the image in CI/CD, and a Containerfile template:
- Go to the repository template;
- Click "Use this template";
- In the "Repository name" section, specify the name of the repository that will be added to your account;
- In the "Template items" section, select "Git content (default branch)";
- Click "Create repository";
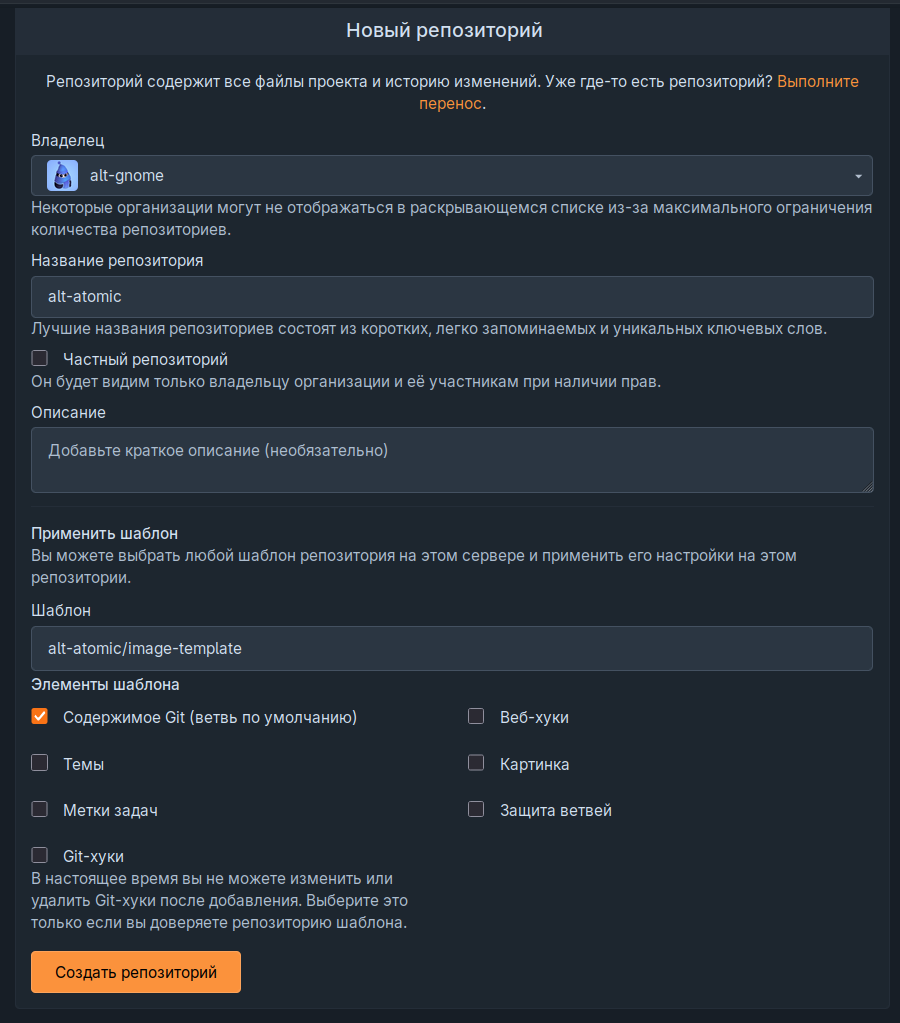
Done. A repository with template elements for creating your own ALT Atomic image has been created on your account.
2. Repository settings
For the image to be built in CI/CD, you need to enable and configure this functionality:
- Open the settings of the created repository;
- Click "Sections" in the sidebar;
- Open the "Overview" section;
- In the main part of the page, enable "Packages" and "Actions";
- Click "Save settings";
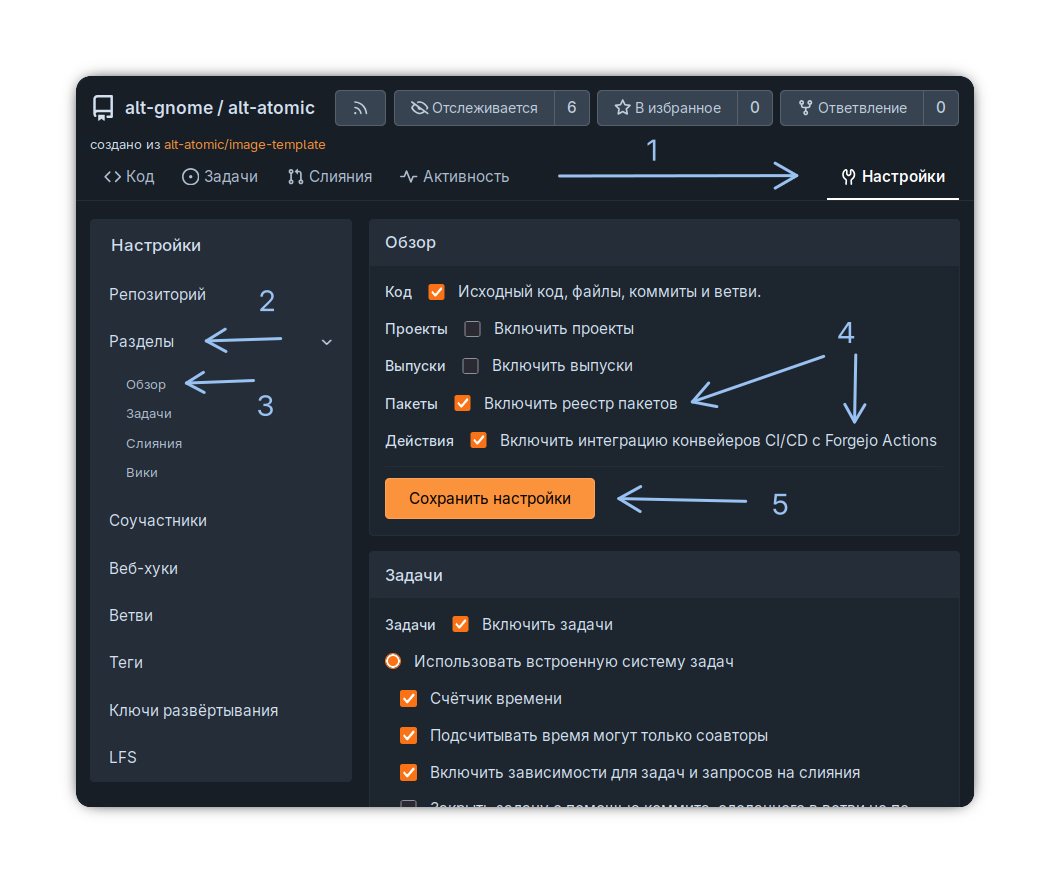
Done. The repository is ready to create OCI containers as packages.
3. Token
Obtaining a token:
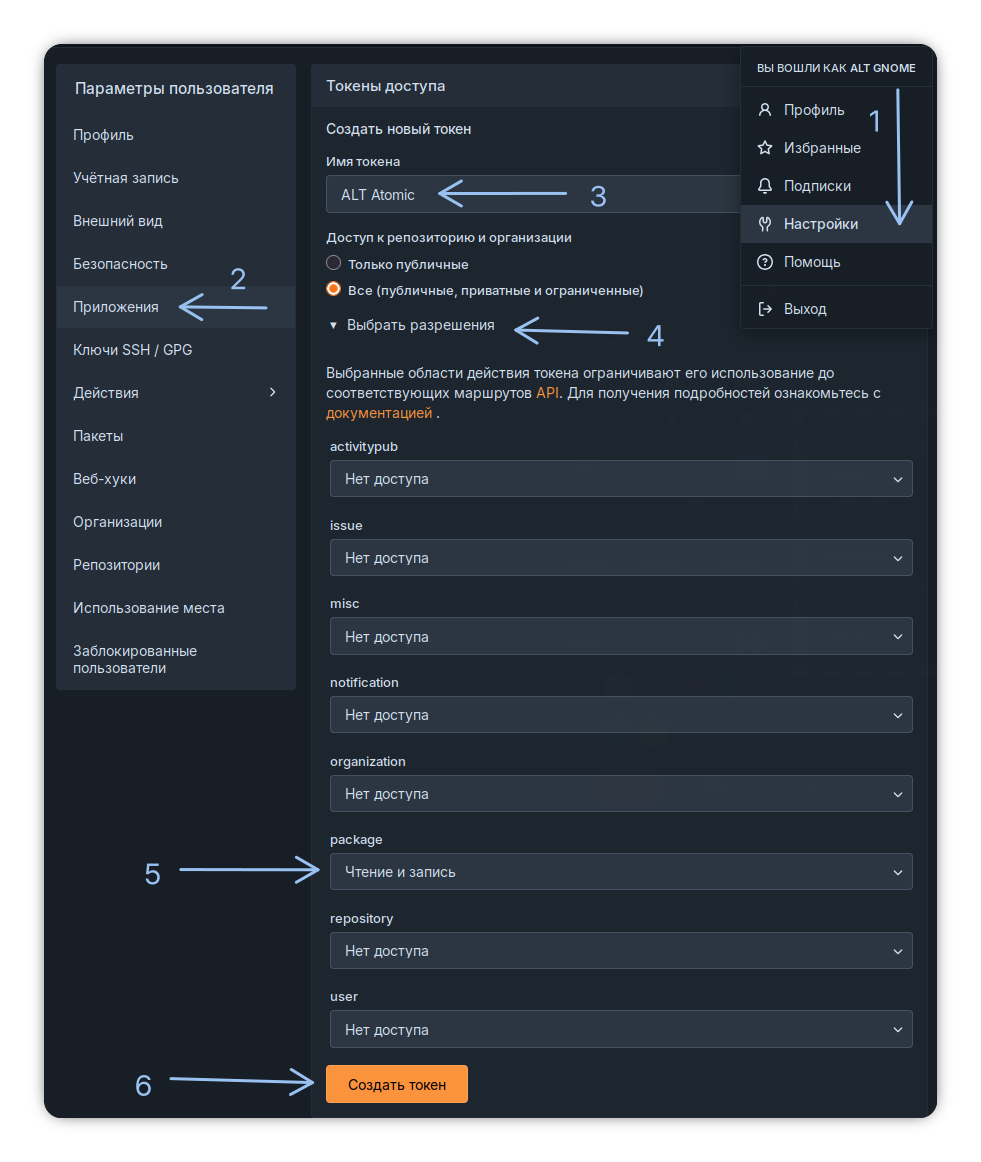
- Click on your profile in the upper right corner and go to "Settings";
- Go to "Applications";
- Specify any token name (does not affect anything);
- Expand the "Select permissions" list;
- Set the value for "package" to "Read and write";
- Click "Create token";
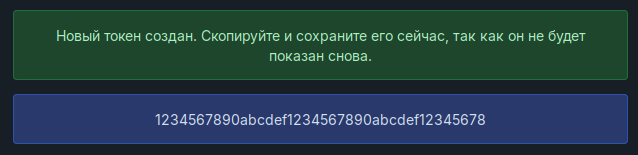
After that, the page will automatically refresh and a set of 16-digit values will appear at the top of the page — this is the token that needs to be copied (or saved in another way).
Note
The example will use a fake token 1234567890abcdef1234567890abcdef12345678
Using the token:
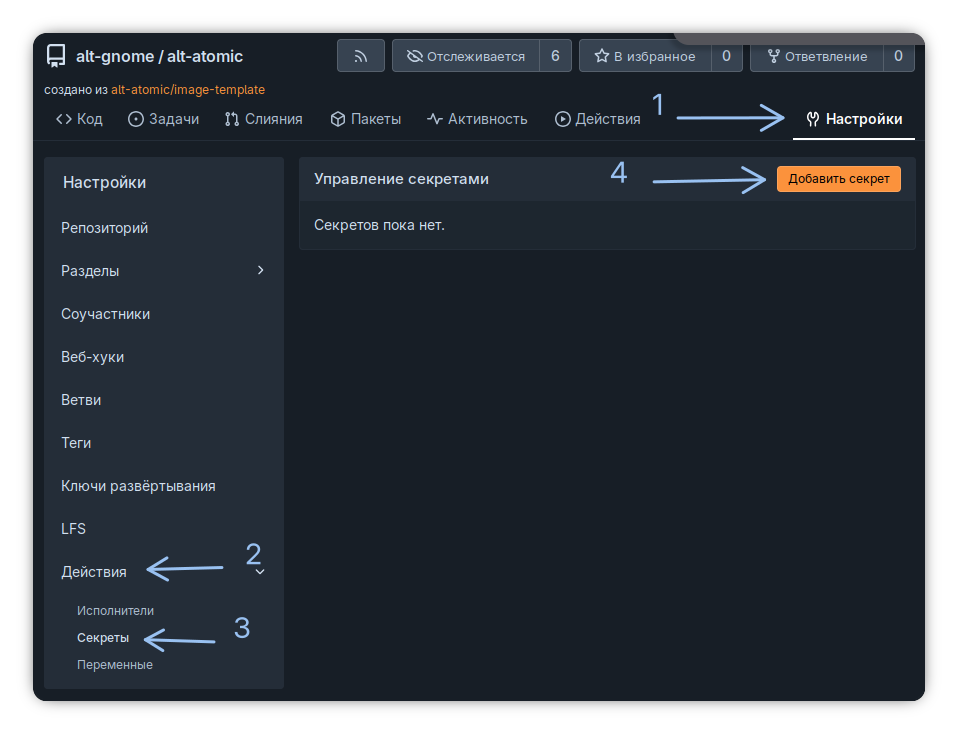
- Go to the settings of the previously created repository with ALT Atomic;
- Click "Actions" in the sidebar;
- Open the "Secrets" section;
- Click "Add secret";
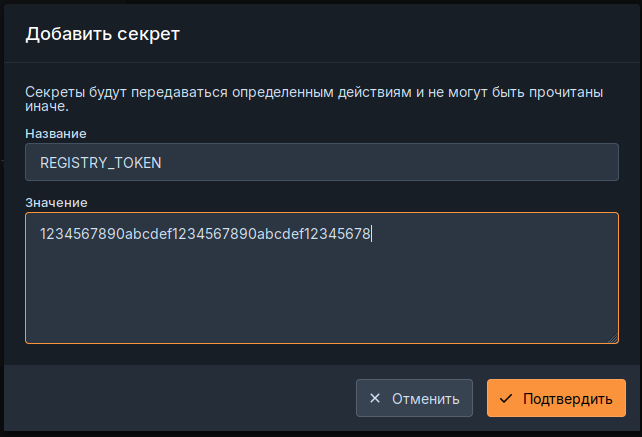
In the dialog that opens, specify the name — REGISTRY_TOKEN, the value — the copied token, and click "Confirm".
Done. The token is now ready to use.
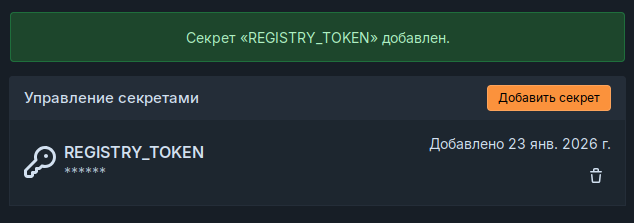
4. Test CI/CD run
You need to check if the token was added correctly:
- In the previously created repository, go to the "Actions" section;
- Click on
build.ymlin the sidebar; - Click "Run workflow" in the main part of the page;
- Click "Run workflow" in the dropdown menu.
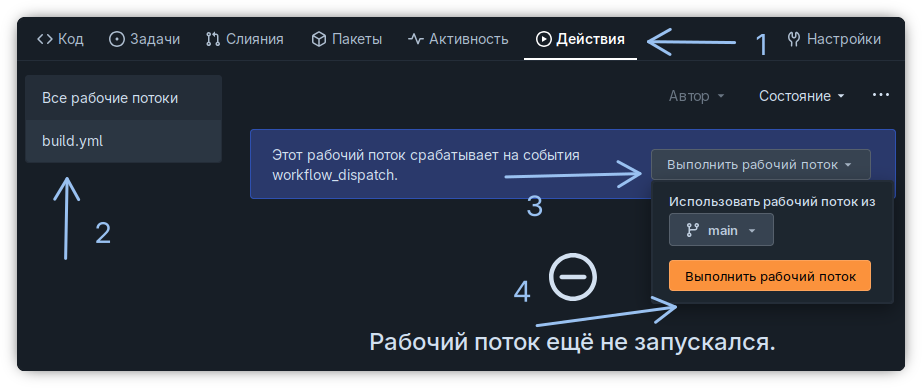
After starting the workflow, a line about the running workflow will appear.

By clicking on the workflow name, you can go to its status page.
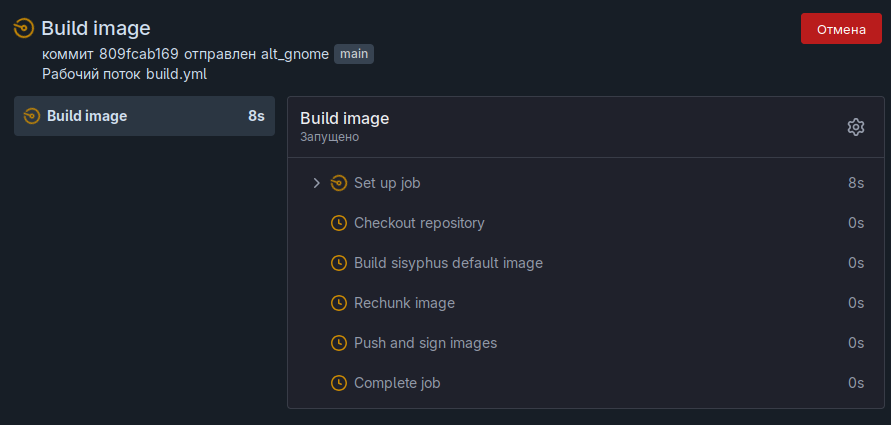
After some waiting, the workflow will complete.
If the workflow fails with an invalid token error, try creating the token again and adding it to the repository secrets.
If the workflow completes correctly, a ready-made blank container created by this workflow will appear in the "Packages" section of your account.
Building your own image
After the test package has been successfully created, you can start filling the image. For this, YAML configuration files are used, where it is declaratively described what and which modules do. More about the modules available for building the image in the article "Configuring the image".
Basic rules for building an image
Attention!
Without a full understanding of the actions, it is not recommended to deviate from the rules described below
By default, the repository template follows these rules:
- All files from which the image is built are located in the
srcdirectory; - The first executed config is
image.yml. Other configuration files can be connected from it; - The
resourcesdirectory contains configuration files and other files needed for the build; - The container description file (Containerfile) is located at
container-files/main. In it, you can change the first configuration file to be run, the resources directory, the arguments passed to the build, and other things; - The workflow file is located at
.forgejo/workflows/build.yml. In it, you can change the build parameters, the target Containerfile, the arguments passed to it, the directory for starting the build process, and other things.